

Timesheets
See how much time each technician clocked, on which jobs, correct or add entries, and export the hours for payroll.
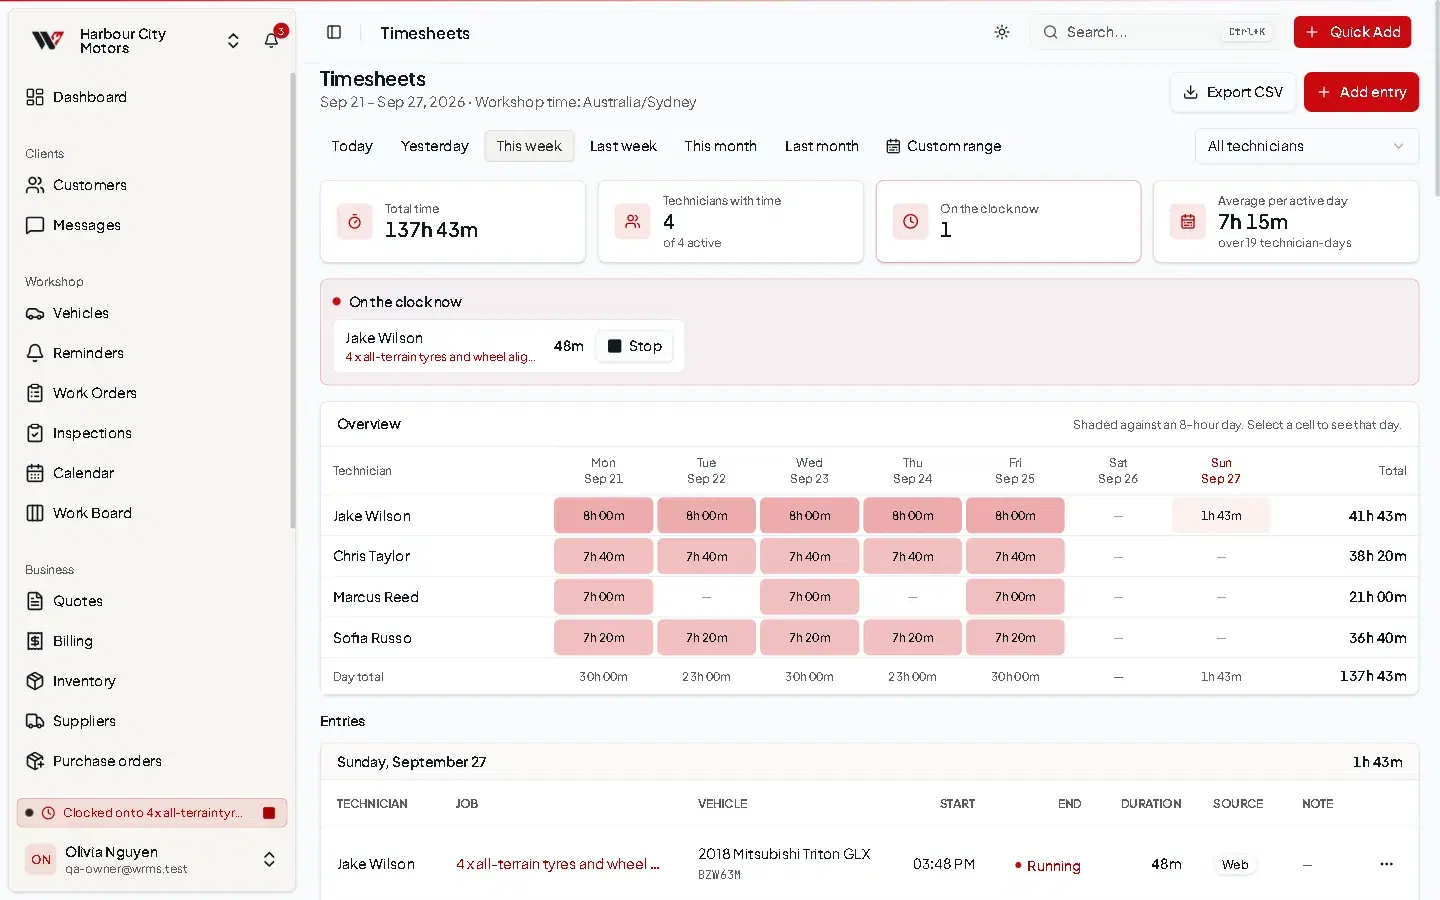
Timesheets shows the time technicians clocked on jobs, per person and per day. Open it from the menu: Business → Timesheets.
The time itself comes from the job clock: technicians select Clock on and Clock off on a work order (see Track time on a job). Timesheets is where you review that time, fix mistakes and take it to payroll.
Before you start
- Add your technicians on the Work Board and link each one to their user account, so they can clock on to jobs themselves.
- To see Timesheets you need Timesheets → View. To add, correct, stop or delete entries you need Timesheets → Edit. Owners and Admins have both.
Choose the period
Pick Today, Yesterday, This week, Last week, This month or Last month, or choose Custom range, set From and To, and select Show range. Use the Technician list to show one person, or All technicians.
The cards at the top show Total time, Technicians with time, On the clock now and Average per active day for the period.
Overview and Entries
- Overview is a grid: one row per technician, one column per day, with a Total for each person. Technicians who have been deactivated are marked Inactive.
- Entries lists every stretch of time: Technician, Job, Vehicle, Start, End, Duration, Source and Note, with a Day total under each day.
Source says where the time came from: clocked in the browser, clocked in the installed app, or added by hand on this page.
Stop a clock someone forgot
On the clock now lists everyone with a running clock. If someone went home without clocking off, select Stop next to their name (or Stop clock on the entry). The time so far is kept, and you can correct the end time afterwards.
Correct or add time
Every correction records who made it and when, so the history of an entry stays visible. Delete removes an entry entirely.
Correcting clocked time does not change what the customer is charged. Labour on the invoice is the labour lines on the work order. On the work order, Add … h as labor turns clocked time into a labour line when you want to charge exactly what was clocked.
Export for payroll
Select Export CSV to download the entries for the chosen period and technician. Open it in Excel, Numbers or Google Sheets, or import it into your payroll system.
Time that crosses midnight
A stretch that runs past midnight is shown on the day it started, marked over midnight. The next day shows only the part after midnight, with a note explaining why.
Troubleshooting
- No technicians yet — add technicians on the Work Board first.
- No time in this range — nobody clocked on or added time for those dates. Technicians clock on from a job's page.
- "Your role cannot add time entries" — ask an Owner or Admin for Timesheets → Edit.
- Times look an hour or more out — check the workshop time zone in Settings → Localization.
Still need help?
Email support@wrmspro.com or use the contact form. Signed-in users can also send a request from Settings → Support.